Pavers vs. stamped concrete for a patio
Stamped concrete gives you one continuous surface for less money, but it will crack somewhere, and a repair always shows. Pavers cost more and can be lifted and put back. Start by working out how big the patio needs to be.
ModelQuoter EditorialPublished Jul 15, 2026Reviewed September 2026
Applies to: US and Canada. The base construction below assumes a climate with freeze-thaw cycles.
What a typical project costs
Paver patio
350 sq ft, standard base
$9,690–13,110
Installed, before tax, at 2026 Greater Toronto rates.
See it on my houseOpen the calculator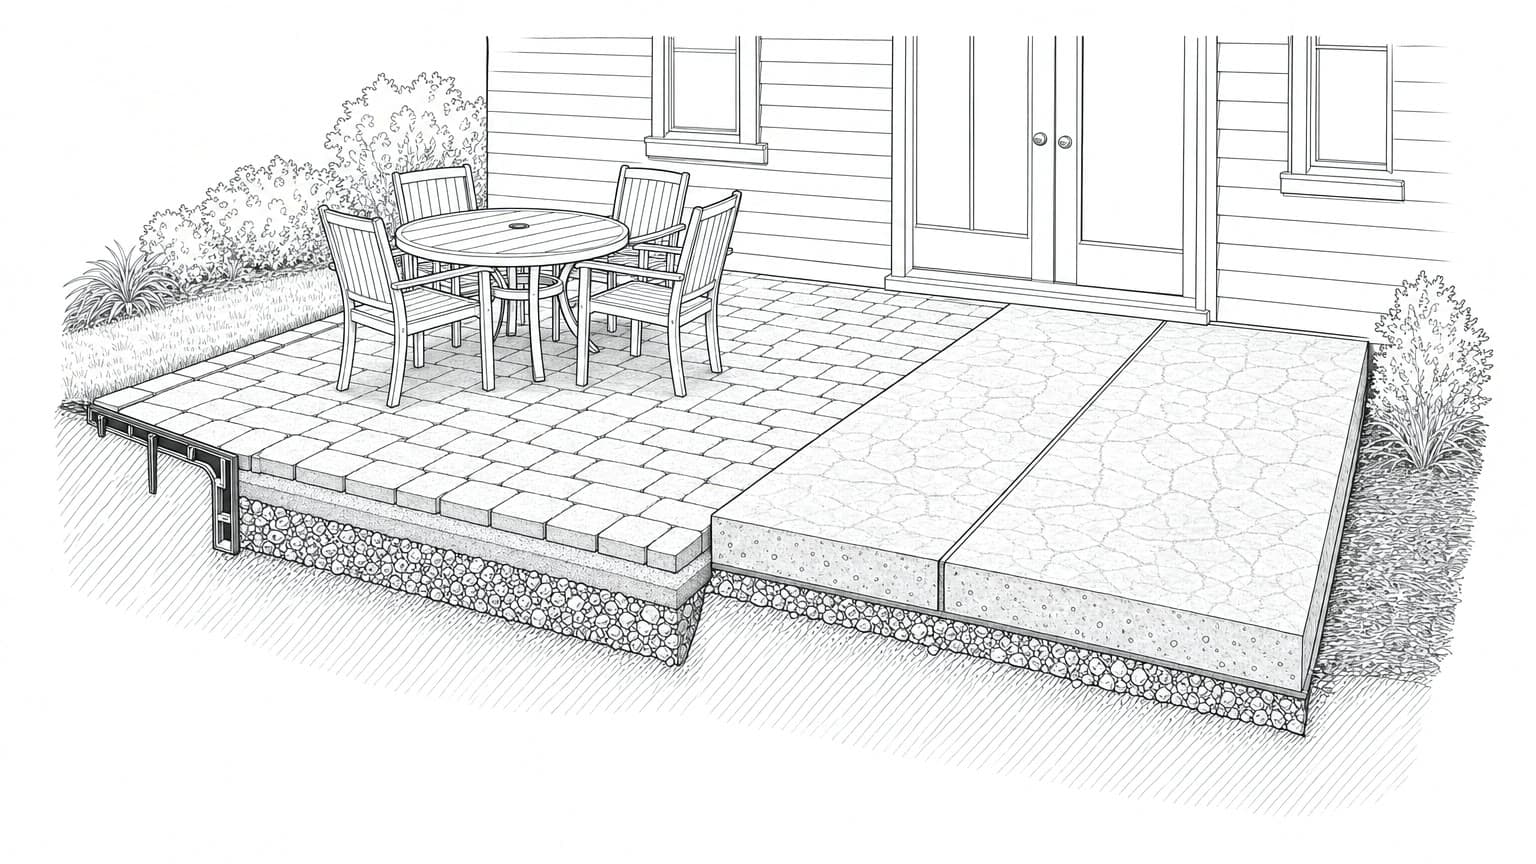
- Pavers can be lifted and put back if the ground settles or you need to dig.
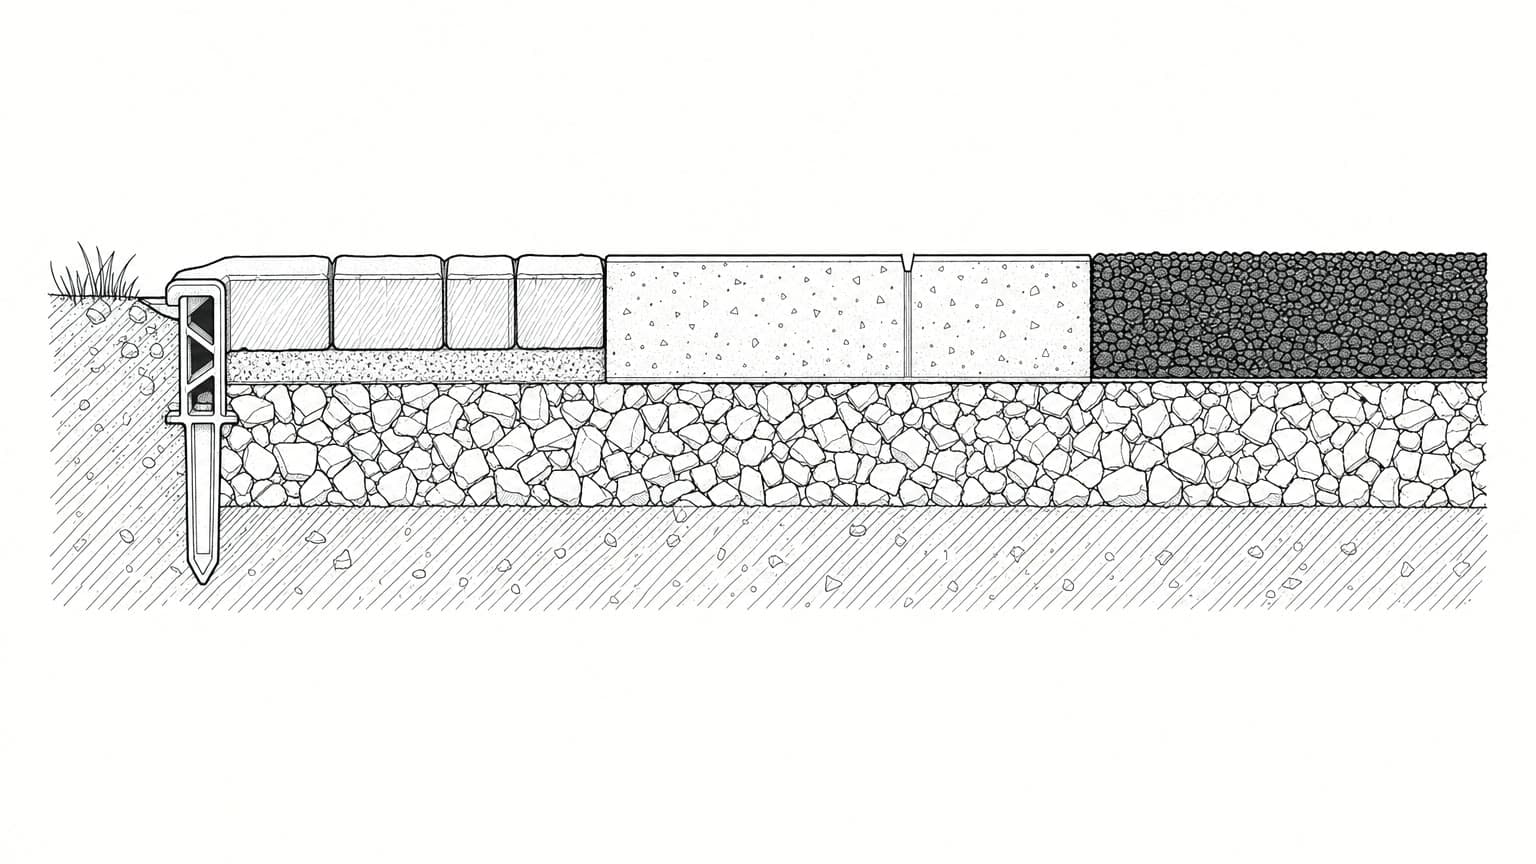
- A sand bed over compacted gravel: the part you can’t see in a finished patio.
- An edge restraint keeps the outer pavers from creeping.
- Stamped concrete: one slab, with a control joint so it cracks in a straight line.
- Size the patio from the furniture, plus room to walk around it.
Size it from the furniture
Patios get priced by the square foot, but they get used like rooms. Start with what you'll put on it and work backwards. You'll end up with a better patio than if you pick a size that sounds generous.
| Use | Clear space to allow |
|---|---|
| Dining for six, with chairs pulled out | About 12 × 12 ft |
| Lounge seating for four | About 10 × 12 ft |
| Fire pit with a ring of chairs | A clear circle about 12–14 ft across |
| Barbecue and prep | Its own 4 × 6 ft area, out of the traffic path |
| Walkway past the furniture | At least 3 ft, with no dead ends |
Then decide what's permanent. A fire feature, an outdoor kitchen, lighting, pergola footings or a hot tub all need something under the surface: gas, wiring, drainage, or a thicker base to carry the weight. All of it is easy before the surface goes down and disruptive afterwards.
Plan for shade early too. A south- or west-facing patio with no shade doesn't get much use in midsummer, and adding a pergola later means cutting footings into a finished surface. If you might want shade, set the footings while the base is open.
Comparing the three surfaces
| Feature | Interlocking pavers | Stamped concrete | Natural stone |
|---|---|---|---|
| Cost | Middle | Lowest | Highest |
| Look | Modular, in a pattern | One continuous surface, stamped to look like stone or wood | Every piece is different |
| Frost movement | Each paver moves on its own | Rigid; cracks where it wants | Depends on the stone and how it's set |
| Repairs | Lift and reset with no trace | Patches always show | Individual pieces can be replaced |
| Upkeep | Re-sand the joints, pull the odd weed | Reseal every few years; the colour fades | Sealing depends on the stone |
| Grip when wet | Good | Depends on the finish; can get slippery | Varies by stone and finish |
| Digging under it later | Lift, dig, relay | Saw-cut and patch | Lift and relay |
Stamped concrete is one solid slab, textured before it hardens. You get a continuous look that pavers can't match, but it acts like a slab. It will crack, and control joints only decide where. The colour is on the surface, so wear and sun change it over time, and you'll need to reseal it every few years. Well-placed control joints steer the cracks into lines that look like part of the pattern, but don't count on a big slab staying uncracked forever where the ground freezes.
Pavers are individual blocks on a compacted base, with sand in the joints. When the ground moves, the pavers shift a little instead of cracking, and any section can be lifted and reset. The downside is the joints. They need re-sanding every few years, and that's where weeds come up if the sand breaks down. You can sometimes lay pavers over an old concrete patio, if the slab is solid, drains properly and the extra height works at the doors and steps. If the slab cracked because the ground moved, that movement will carry on under the pavers.
Natural stone is the premium choice, and how it holds up depends on the stone. Dense stone handles freezing and thawing well. Porous stone soaks up water and can flake. Ask about how the stone does in your climate before you choose it on looks alone.
Getting the installation right
Just like a driveway, a patio lasts or fails because of its base. That means digging deep enough, compacting gravel in layers, and deciding where the water goes. Get those right and the patio will still be flat in ten years.
- 1.
Dig deep enough
There has to be room for the base, the bedding layer and the surface. Skimping here doesn't show on day one, but it shows after three winters.
- 2.
Compact in layers
Put the gravel down in shallow layers and compact each one. A single deep layer can't be compacted all the way through and will settle unevenly.
- 3.
Set the slope first
A patio should slope away from the house, about a quarter inch per foot. Perfectly level looks right on paper and leaves puddles after every rain.
- 4.
Put edge restraints on pavers
Without them, the pavers spread out from the edges. It's a must, and it's often the first thing a cheap quote leaves out.
- 5.
Cut control joints in concrete properly
To the right depth and soon enough after the pour. Those cuts decide where the cracks go.
- 6.
Run services first
Lighting, gas for a fire feature, irrigation and drainage are simple before the surface goes on and expensive after.
- 7.
Check whether you need a permit
A patio at ground level usually doesn't need one, but lot coverage and stormwater rules can apply. A raised patio, or one with a structure over it, often does.
Price a patio in concrete, pavers or natural stone using 2026 market rates in our calculator.
Open patio calculator